Tension, or stress, headaches are by far the most common types of headaches—affecting 30 to 80 percent of adults in the U.S. while three percent (the majority of them women) suffer from chronic daily tension headaches.
Although there are a variety of reasons these headaches occur, in general, tension headaches are caused by tightness in the back of the neck, trapezius muscles and base of the skull brought on by stress, fatigue and/or poor posture. Considering the many benefits of Restorative Yoga, it’s easy to see why yoga for headaches is an effective practice for relieving as well as preventing tension headaches.
Myofascial Release for Relieving Headaches
Additionally, while foam rolling isn’t necessarily a yoga technique, self-care is a large part of what it means to have a yoga practice and thanks to the new science of self-care, we now understand the importance of myofascial release in our overall health and well-being. And when it comes to myofasical release, the foam roller is a yogi’s best friend.
Knowing how to use the foam roller to relieve tension in your upper back, shoulders and neck can help diminish tension headaches, especially if you catch them early. The next time you feel a tension headache mounting, head to the nearest foam roller and try the following three exercises.
3 Foam Rolling Exercises for Tension Headaches
1. Begin by opening and releasing the muscles across the front of your chest, which are most likely pulling your shoulder heads forward and inner shoulder blades off your back, creating tension in the upper back and neck. In fact, I can often ward off an approaching headache by spending a few minutes with the roller under my spine opening my chest.
 With the foam roller lengthwise, sit on one end of the roller with your knees bent and feet flat. Slowly lower yourself onto the roller so that it’s supporting your pelvis, spine and the back of your head. Lengthen your arms down by your sides, resting the back of your hands on the floor (for more of a stretch create “cactus arms” with your elbows bend at the height of your shoulder and back of the hands resting on the floor above your elbows).
Take 10 deep breaths allowing the foam roller to passively open your chest. Play with rocking more to one side and then the other for a deeper stretch. Another great exercise is to circle the arms up, overhead and down by your sides four or five times in this position.
Side Note: This is an essential foam rolling exercise to do periodically in order to relieve upper back tension and reverse poor posture from long hours of sitting at the computer or driving, and is great for moms who are still breastfeed and/or carrying their babies around.
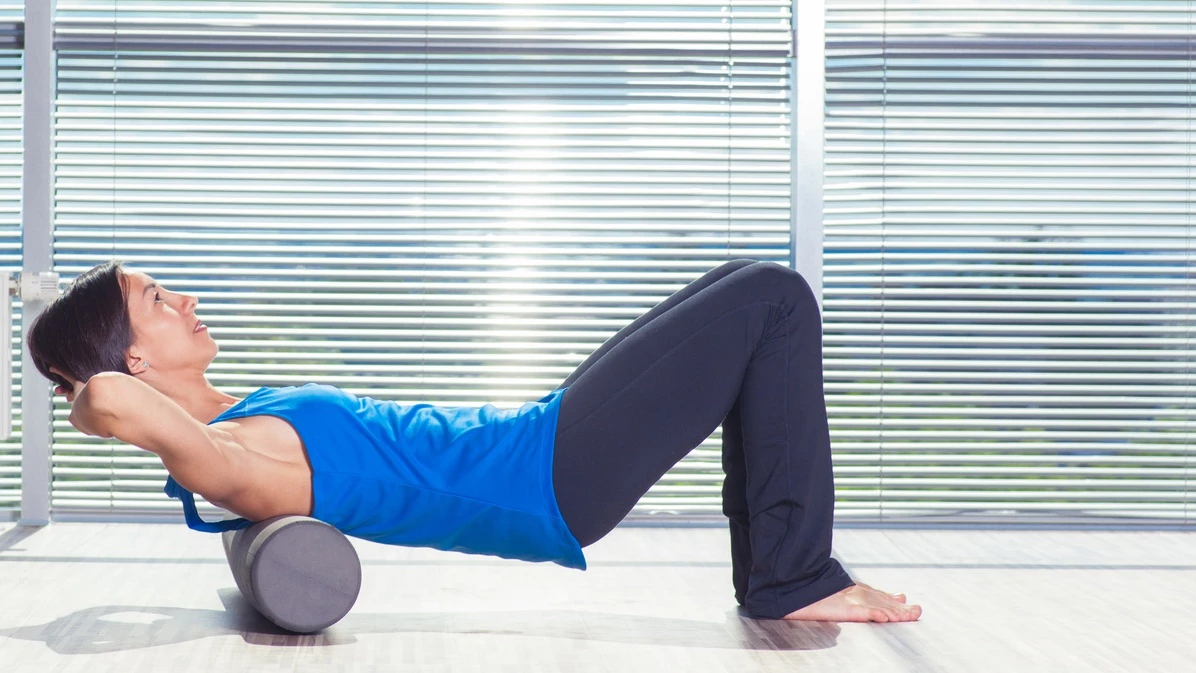
2. Next, roll out your upper back.
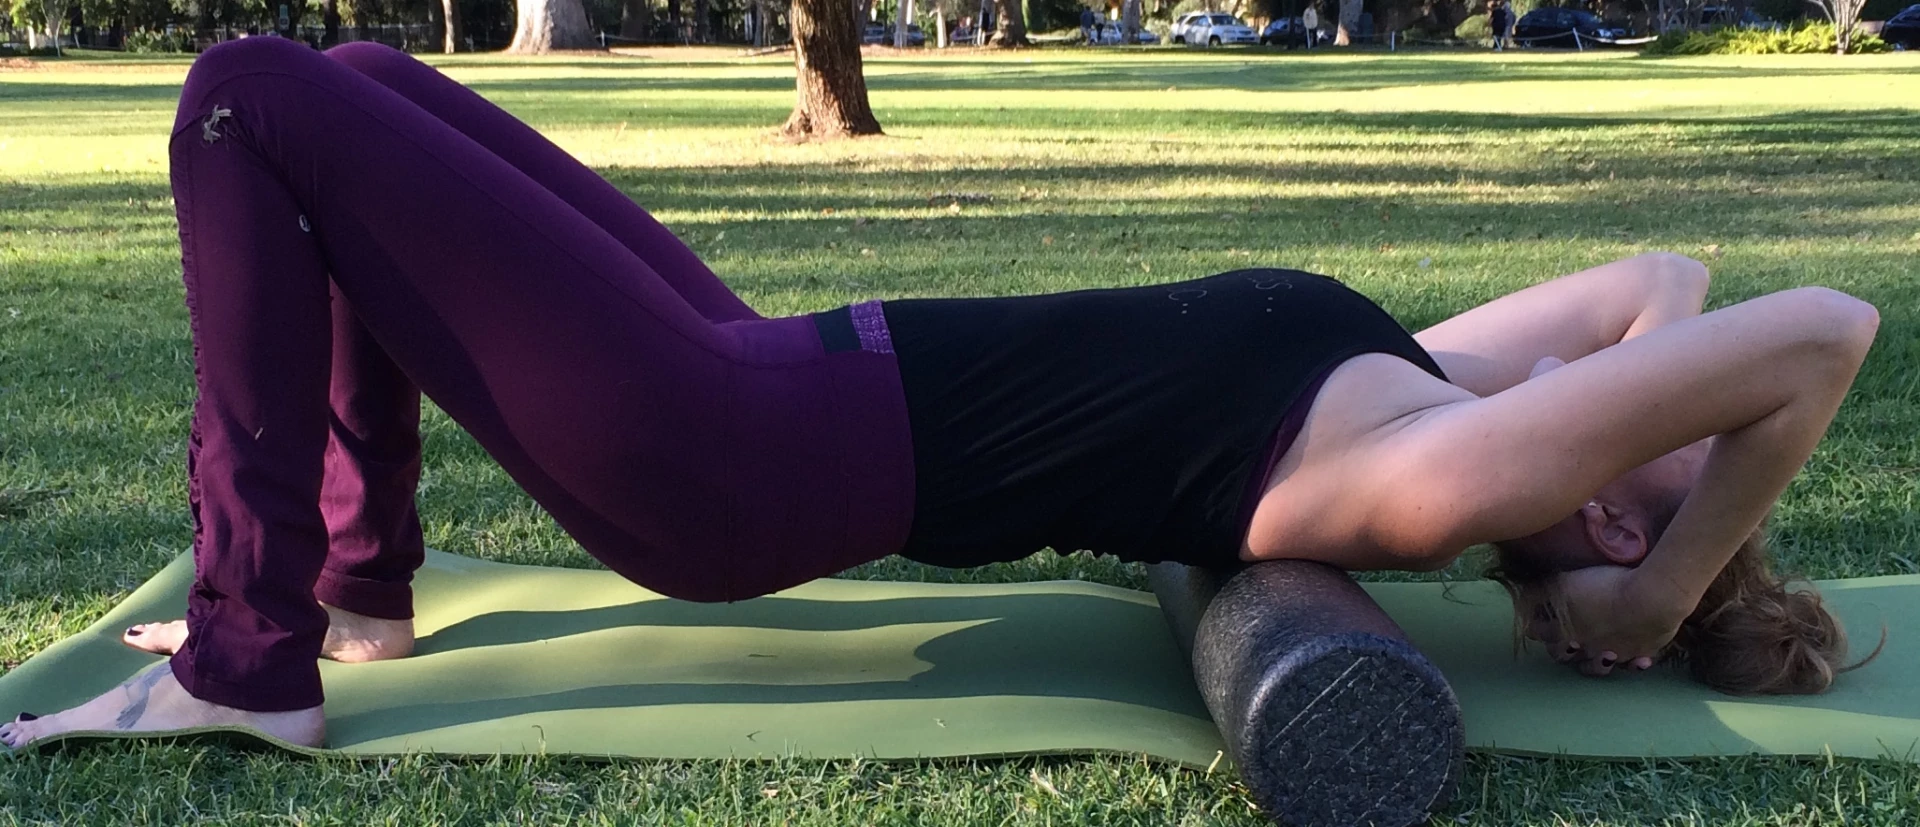 Sitting on the floor with your knees bent and feet flat, lower your upper back to the broad side of the foam roller (so that the roller is perpendicular to your torso). Place your hands behind your head, supporting your head and neck, and lift your butt off the floor slightly tucking your pelvis under to protect your low back. Keeping your head back in your hands, push into your feet and slowly roll forward and back moving the roller up to the tops of your shoulders and down to your mid back.
Play with leaving your elbows opened wide as well as hugging your elbow tips closer together, really allowing your head to rest back. As your thoracic spine opens you may eventually be able to rest your butt on the floor as you roll out your upper back; however, that isn’t the goal.
3. One of the missing links to releasing upper back, shoulder and neck tension is opening the side ribs and releasing the latissumis dorsi (a.k.a. your “lats”).
 Lying on your left side, extend your left arm along the floor (palm up) with the broad side of the foam roller underneath your left armpit. Place your right foot flat in front of your left leg for support (feel free to bend your left knee for comfort) and rest your right hand on your right hip or on the floor in front of you. Slowly begin to roll up and down the length of your left rib cage from about mid-waist to your armpit. Repeat on the right side, and also breathe!
Bonus: Keep your right palm turned up and continue rolling up past your armpit to the back of your arm directly below your shoulder head, helping to release your teres major and minor of the rotator cuff. When you find a tender spot gently rock your torso back and forth, massaging the area.
YogaUOnline is proud to have Ellen Saltonstall as part of our Premium Practice Channel – check out Ellen’s practices including her Bodymind Ballwork practices.
Read another great article from YogaUOnline and Meagan McCrary – When Stretching Hurts: The Science of Connective Tissue.
 Meagan McCrary is an experienced yoga teacher (E-RYT 500) and writer with a passion for helping people find more comfort, clarity, compassion and joy on the mat and in their lives. She is the author of Pick Your Yoga Practice: Exploring and Understanding Different Styles of Yoga a comprehensive encyclopedia of prominent yoga styles, including each system’s teaching methodology, elements of practice, philosophical and spiritual underpinnings, class structure, physical exertion and personal attention. Currently living in Los Angeles, Meagan teaches at the various Equinox Sports Clubs, works privately with clients and leads retreats internationally. You can find her blog, teaching schedule and latest offerings at www.MeaganMcCrary.com
